

Having a lush indoor garden can quickly turn stressful when you notice a plant wilting or showing signs of distress. Understanding how to rescue a dying houseplant is crucial. This guide covers the essential steps, from identifying the root problem to adjusting care routines. Follow these simple yet effective techniques to rejuvenate your indoor greenery. Take control today and give your houseplant a new lease on life!
Identify the Problem
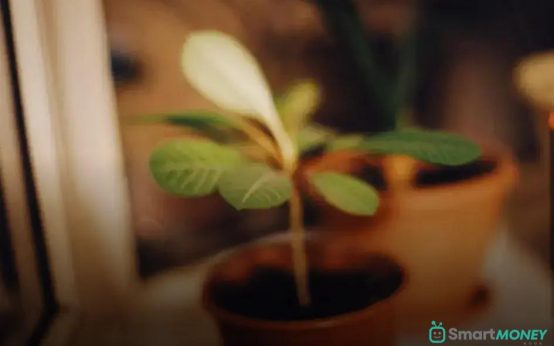
The first step in reviving a dying houseplant is to identify the problem that’s causing its decline. This process begins by closely examining the plant’s symptoms, as they offer clues to the potential issues. Yellowing leaves, for instance, may indicate overwatering or poor drainage. It’s crucial to also look out for signs of underwatering, such as wilting or crispy leaf edges.
Inspect the leaves for any unusual spots or patterns, which could be a symptom of pest infestation or disease. A lack of growth in your houseplant might suggest insufficient light or nutrient deficiency. If the plant seems to be stretching or leaning towards the light source, this likely means it’s not receiving enough light.
Observe the soil conditions. Ensure it is neither too wet nor too dry by poking a finger into the soil about an inch deep. A damp feeling could mean the plant has been overwatered, whereas dry soil points to a lack of water. Keep an eye out for any suspicious odors, which might signal root rot.
To effectively troubleshoot, take note of any recent changes in the plant’s environment, including relocations or alterations in care routine. Remember, a systemic approach will help you diagnose the problem accurately, allowing you to take the necessary steps towards reviving your plant.
Adjust Watering Practices

Watering is crucial for plant health, but too much or too little can harm your indoor greenery. Observe your plant’s leaves and soil to determine the correct watering frequency. If the leaves are wilting and the soil feels dry, it’s time for a drink. However, soggy soil and yellowing leaves often indicate overwatering.
Start by checking the soil moisture before you water. Gently insert your finger an inch into the soil. If it feels dry, it’s time to water. If it’s damp, hold off and check again in a few days.
Watering Techniques
Consider the watering method, too. Opt for a direct approach, watering at the base of the plant to reach the roots. Use room-temperature water to avoid shocking the plant. Ensure the pot has drainage holes to prevent water from pooling at the bottom, which can lead to root rot.
Adjust your watering schedule according to the season and environment. During winter, plants generally require less water due to slower growth, while in the warmer months, more frequent watering might be necessary.
For a more consistent watering routine, consider using a watering calendar or setting reminders. This practice helps maintain a regular schedule and prevents accidental neglect.
Understanding your specific plant’s needs is essential for tailoring your watering practices effectively, ensuring your houseplant thrives rather than just survives.
Improve Lighting Conditions
Proper lighting is crucial for a houseplant’s health. Many plant issues can be traced back to insufficient or excessive light. Begin by adjusting the plant’s placement. Ensure your plant receives the right amount of sunlight for its species. Some plants thrive in bright, indirect light, while others prefer the dim corners of your home.
Observe the leaves for signs: pale leaves could indicate too much sun, while leaning or sparse growth might suggest a lack of light. Move plants closer to or away from windows accordingly. Consider using sheer curtains to diffuse intense sunlight.
In rooms with limited natural light, supplement with grow lights. LED grow lights are an excellent choice, providing full spectrum light which mimics the sun’s rays. Place them about 6-12 inches above the plant, and keep them on for about 12-16 hours a day, depending on the plant’s needs.
Rearranging your plants occasionally can also expose them to a more balanced light source. Remember, regularly cleaning dust off the leaves allows plants to absorb light more effectively.
Choose the right location
to give your plants the best chances to thrive, and you’ll see an improvement in their vitality.
Check Soil and Repot

The health of your houseplant's soil is crucial to its revival. Examine the soil for signs of compaction or poor drainage, as these can suffocate the roots. Gently probe the soil with a finger or small tool to check its condition. If the soil feels overly damp or emits a foul odor, this may indicate root rot or bacteria growth.
Choose the Right Soil
For many plants, a well-draining potting mix is essential. Consider using a mix with perlite, vermiculite, or sand to improve aeration and drainage. Be sure it is suitable for your specific plant type. Repotting might be necessary if the current soil is severely compacted or infested.
Repotting Process
Gently remove the plant from its current container by tipping it slightly and supporting the base. Shake off excess soil from the roots, and inspect them for signs of rot or disease. Prune any damaged or dead roots using sterilized scissors to promote healthy growth.
Select an Appropriate Pot
Choose a pot that is slightly larger than the previous one to allow for root expansion. Ensure it has adequate drainage holes to prevent waterlogging. When placing the plant in the new pot, fill it with fresh potting mix, being careful to position the plant at the same depth as it was before.
After repotting, water the plant thoroughly, allowing excess water to drain away. This helps settle the new soil around the roots. Keep the plant in a suitable location, according to its light and air circulation needs, to aid in its recovery.
Monitor and Maintain
Once you’ve taken the initial steps to revive your ailing houseplant, it’s crucial to monitor and maintain its new environment. Observing your plant regularly allows you to notice early signs of improvement or any further issues. This vigilance can prevent minor problems from becoming major setbacks.
Begin by keeping a consistent watering schedule. Use a moisture meter to ensure the soil retains the right balance of moisture. Over time, you’ll get a sense of when your plant needs watering without the need for constant measuring.
Pay attention to the environmental conditions such as light and air quality. Rotate your plant every few weeks to ensure all sides receive adequate sunlight, which can aid in even growth. If natural light is insufficient, consider investing in a grow light to supplement its needs.
Regularly inspect the plant for signs of pests or diseases. Catching these early can lead to prompt treatment, preventing significant damage. Use organic pest control methods, such as neem oil or insecticidal soap, to tackle any issues without harming the plant.
Prune any dead or yellowing leaves to encourage healthy new growth and improve air circulation around the plant. Doing so will also help the plant focus its energy on thriving parts, making recovery quicker.
Lastly, keep a close eye on the plant’s growth and make necessary adjustments. Sometimes, even the smallest change in procedure, like adjusting the position of the plant or changing the type of fertilizer, can significantly enhance your houseplant’s health. Keep records of any changes and results for more targeted care in the future.
 How to Start a Plant Journal to Track Growth Effectively
 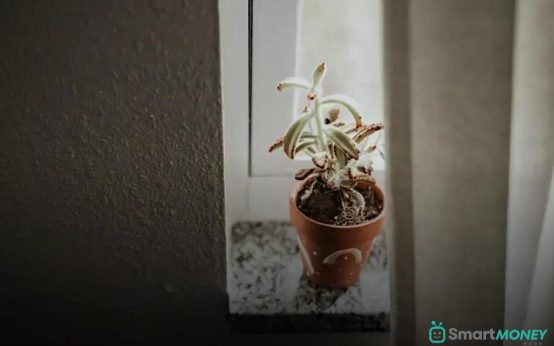 Growing Edible Plants Inside Your Kitchen: Tips & Tricks
 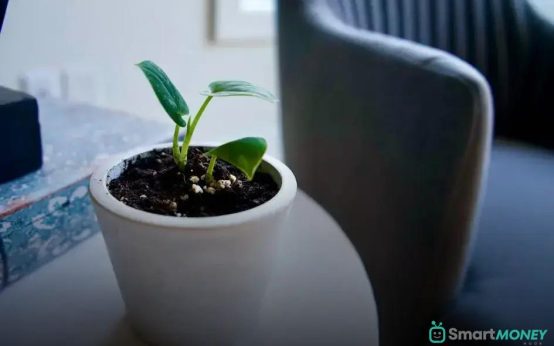 Caring for Plants in a Humid Apartment: Essential Tips